Nicola Dress: How to do a Full Bust Adjustment
Today I'm going to share how I did the Full Bust Adjustment needed for my Nicola wrap dress.
An FBA will produce a bust dart. Normally this isn't a problem but I didn't want to add another dart to a bodice that already had three at the waist. In addition, my fabric was slightly stiffer than the recommended fabrics and I was sure that a bust dart would change the shape of the bodice more than I would like. So the excess of the bust dart needed to be moved to the darts at the bottom. Here's how I did it using the slash method. Sorry if you prefer to pivot darts - I just can't get my head around that method!
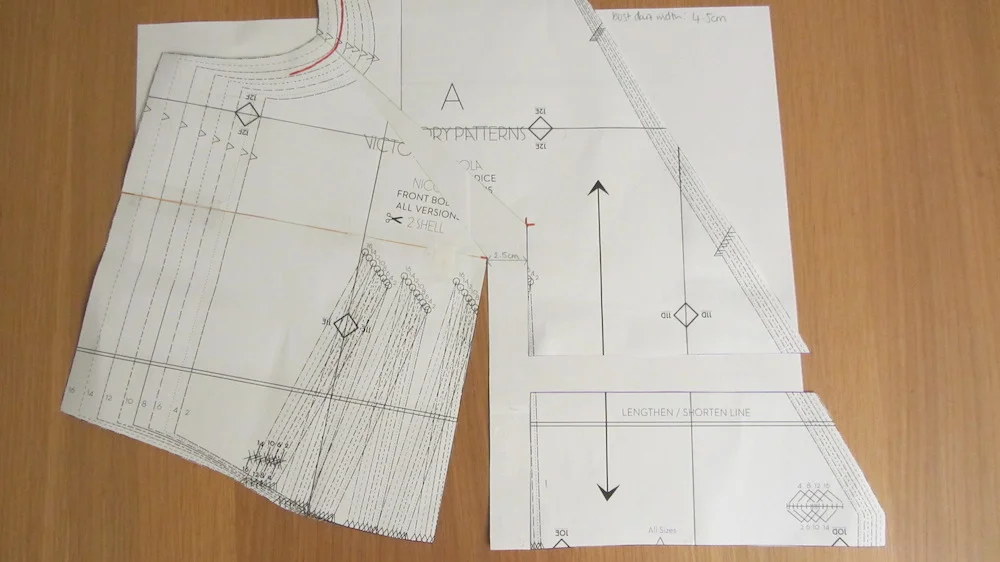
Take your bodice pattern piece. Mark where the apex of your bust is. Draw in your seam allowance at the arm hole, in this case 1.5cm.

Draw a vertical line from the apex to the waist line (blue line). Draw a
line from the apex to the middle of the armsyce (green line).
Draw a horizontal line from the apex to the side seam (imagine a bust dart here, the line goes through the middle of it) (red line). Finally, starting midway up the waist dart, draw a horizontal line to the centre front (purple line).

Time to slash your pattern. Cut up the blue line, through the apex and continue to cut the green line until you reach the seam allowance. Stop here, don't cut through to the allowance. Snip into the seam allowance directly above but make sure you don't cut through - you want this piece to pivot. Cut along the red line but stop short of separating it completely - again you want enough paper attached that this piece can pivot. Cut the purple line completely - it should come apart from the pattern.

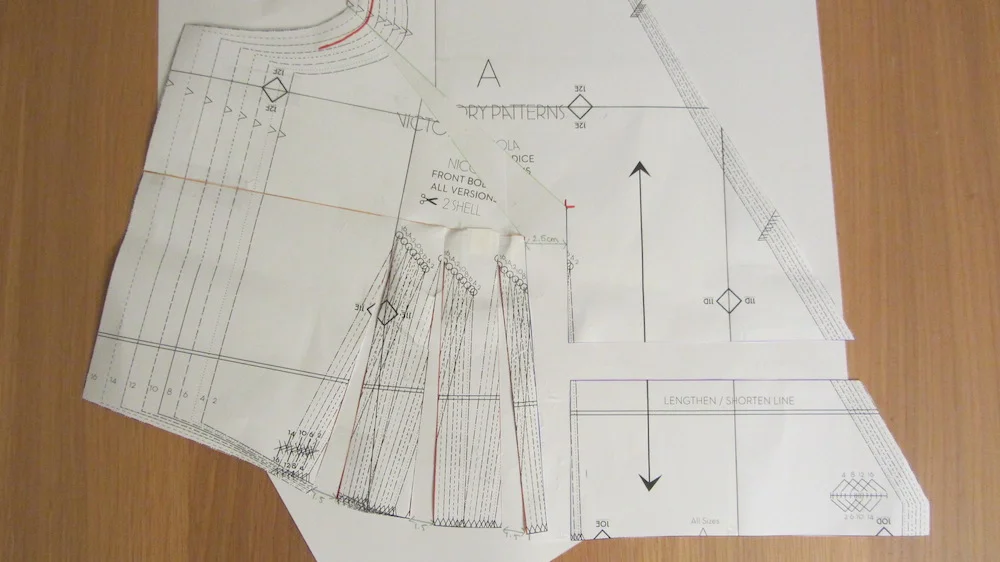
Place a piece of paper underneath your pattern - you'll need this to fill in the gaps. You're now going to open the apex by the amount you need to increase the bust. In this case, I'm adding 2.5cm but yours may differ. In order for the pattern to lay correctly, you will see a bust dart form on the side. Tape the bodice down.

The last step increased the length of the side seam. To make the centre front seam match, take the separated piece of your pattern and lower it until the centre front seam matches the side seam. Tape in place.

Now it is time to remove the bust dart. Measure the dart at the side seam and make a note of it. Cut the lower line of the dart to the apex and the left hand part of the blue line.
Move the pattern up so that the bust dart is closed and tape in place.
Cut up the right hand line of each of the three waist darts to the red line - this will help the pattern lay flat when you move the darts.
Divide the number you jotted down by three. This will be the amount you are adding to each waist dart. One by one, move the waist dart to include the amount and then tape down.
Now you need to redraw the three darts. The tip of the dart will be at the same height but make sure you place the point in the centre of the opening. Draw lines from the bottom to the tip. Straighten up the bottom of the bodice and the front seam. Your pattern piece is now ready for use.