Father Christmas Felt Applique Stocking
While it may have been quiet over here for a while, the last few weeks of 2018 saw an almost endless stream of creative activity as I completed seven Christmas presents and made a large number of fabric wrapping bags in an attempt to make gift giving a little more sustainable. It was wonderful to get lost in fabric, felt, thread and patterns again. I'll be sharing most of them here but may mix up the timing a little, focussing for now on the most festive makes.
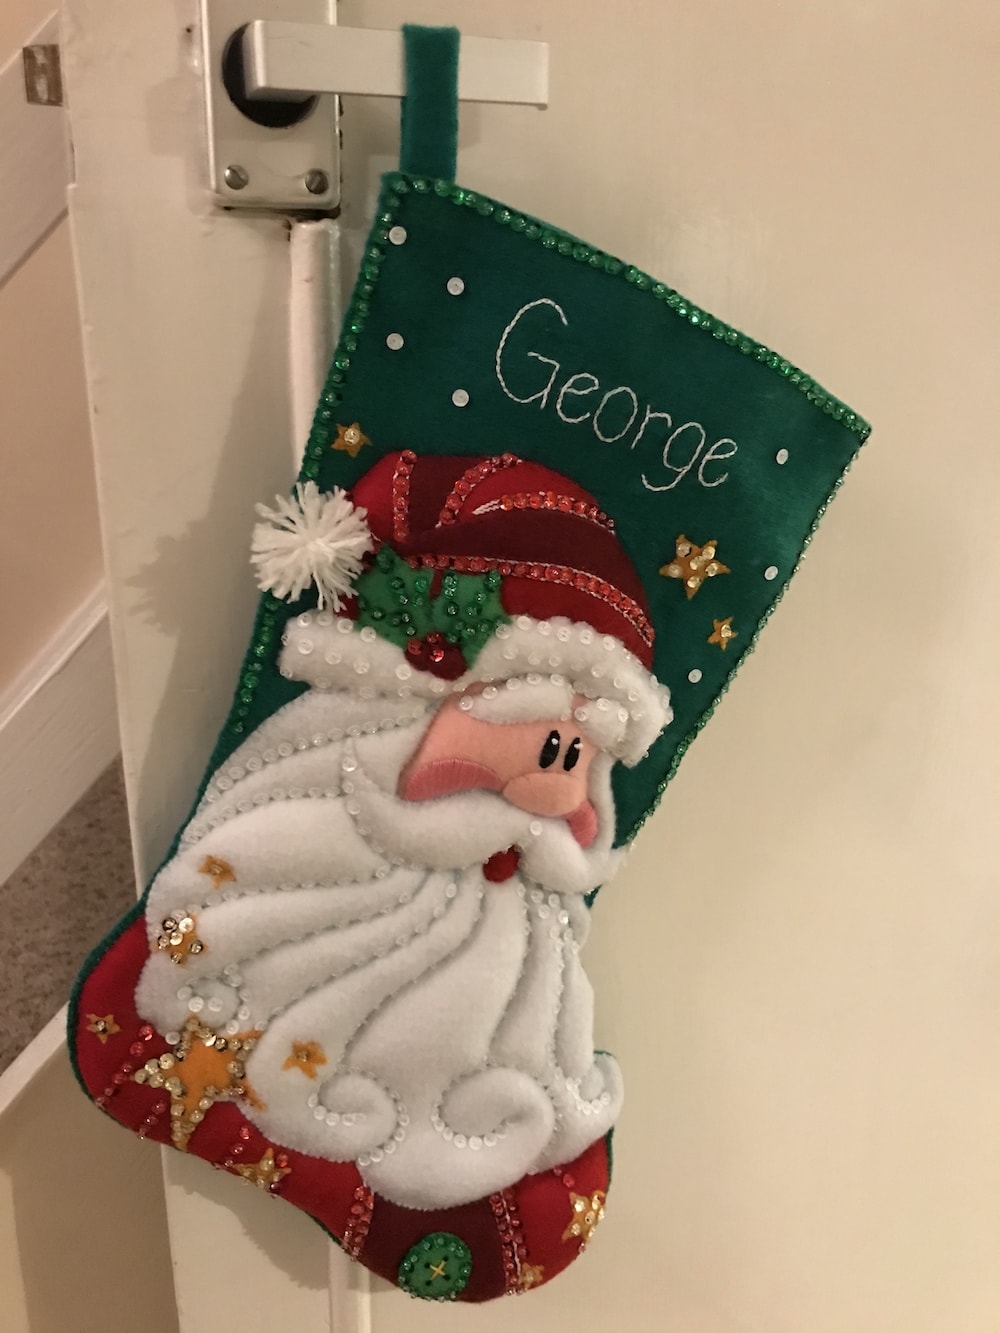
Felt is a popular fabric at Christmas and I admire decorations made with it. I had been longing to attempt something more complex than small penguins that hang from the tree and making a stocking for Adam's four year old godson seemed to be the prefect way forward. As I'm not that experienced in using felt, I knew I wanted a kit and got slightly lost down the rabbit hole. Have you seen some of the kits? They are incredible! We wanted something playful that would last throughout his childhood and chose Father Christmas as the main character. Having seen a few previous versions, I selected Dimensions Felt Appliqué Sequin Santa Christmas Stocking and purchased it from Sew Essential.
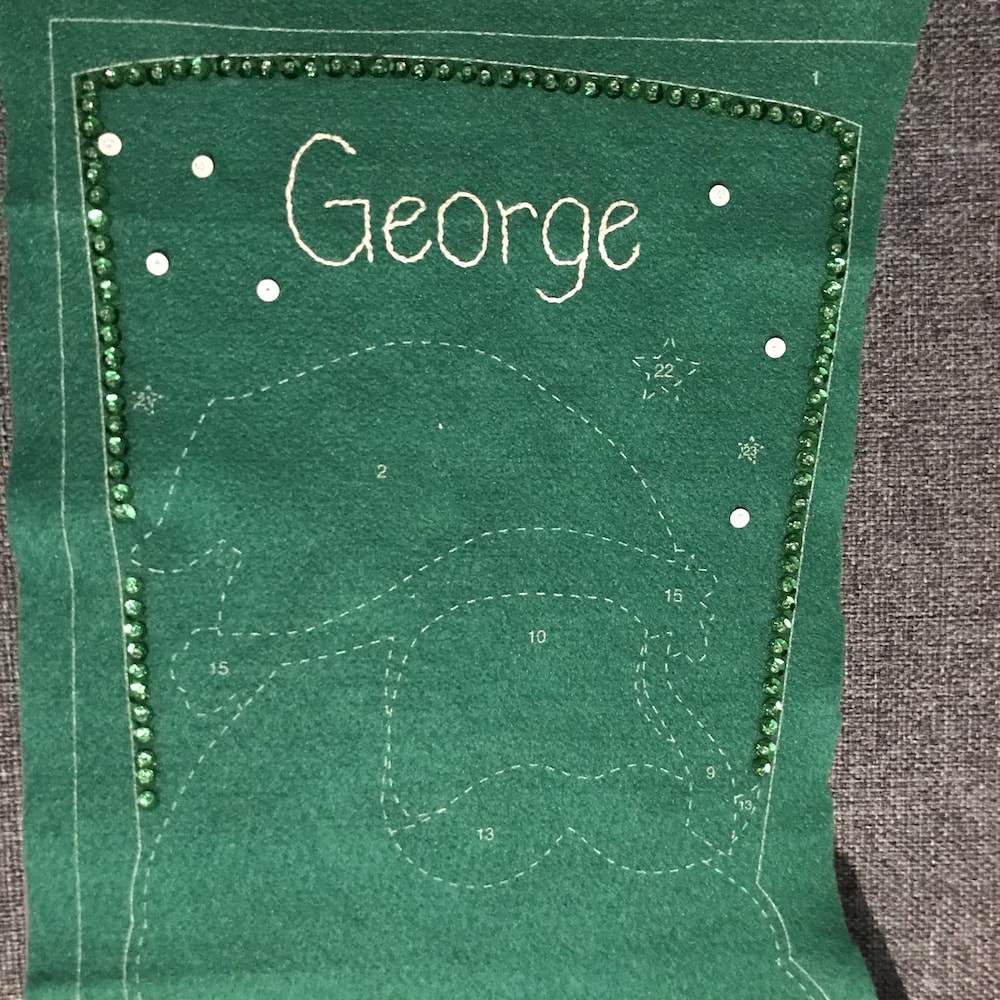
The kit contains everything you need except the stuffing. The instructions detail the steps to complete the stocking (think of it as painting by numbers for felt) as well as diagrams on the various hand stitches you will need to master as the stocking is made completely by hand. I would recommend reading through the full instructions before getting going. On the advice of many bloggers who had previously created a stocking, I did follow the instructions but there were a few steps where I mixed up the order as it made more sense to me and seemed easier to add details without the large stuffed areas getting in the way. All of the pieces come numbered and printed onto the right colour felt for cutting out. You have the choice of cutting them out at the beginning or as you go along. I chose the latter as the numbers are on the outside of each piece and I would lose track quickly of which piece was which number. In addition, cutting them as needed meant they remained neat and didn't accidentally stretch or become warped.

I loved creating this. It becomes personal right from the start which is where you add the name of the recipient and a long line of sequins. I diverged from the original stitch as I just couldn't get it to work around the curves. I've forgotten the name of the stitch but essentially you make a stitch and pull the needle up mid way through that stitch on a particular side, make a new stitch and repeat. The end result looks like twisted rope. I used split stitch instead which gave me much better control in creating smooth curves. Father Christmas comes to life fairly quickly in stages: hat, face, and beard.

There's a surprising amount of work in the hat and the cheeks require careful long stitches but the majority of the time is spent on the beard. I didn't make this stage easy for myself. Compared to the finished photo in the kit, I overstuffed all parts that required it to bring Father Christmas more to life. The consequence was the stitching lines in the beard were harder to complete and required careful work to ensure the tension on the thread wasn't too much. The part I found the hardest was keeping the points of the smaller stars sharp and in place while I stitched. Adding the sequins was especially satisfying and quick to do once you got into the rhythm.

Another consequence of overstuffing was the front of the stocking rippled with the stitching lines. In addition, you end up with a lot of thread on the back side. To prolong the life of the stocking and to ensure that no presents would accidentally pull a piece of thread, I added a protective layer of felt to the front before adding the back. Stitching through three layers of felt was a breeze compared to the beard! I didn't clock watch, I estimate the entire project took about 22-24 hours to complete. I thoroughly enjoyed every moment of it - it was one of those projects that you just couldn't wait to pick up again.
