How to make a hidden expandable waistband
Over the past couple of months, I have been working on a project for a friend. He wanted a novelty Christmas suit that could stand up to the holiday season but was also comfortable to wear. Minerva kindly supplied the fabric for this project, and you can read about the full adventure of making it over on their site.
I’m thrilled with how it turned out but there is one section that I’m proudest of - the hidden expanding waistband. We wanted to build in maximum comfort and allow the trousers to expand as the festive indulgence creeps in, but we didn’t want the elastic to be obvious. I decided to copy my husband’s ready to wear trousers but couldn’t find a useful tutorial anywhere. With a lot of trial and error, we eventually cracked the construction.
The waistband is formed of six pieces of fabric and two lengths of elastic. The front waistband is attached to the first length of elastic which is secured to the back waistband just above the dart. This allows the front waistband to slid through an opening in the back waistband at the pocket. Movement is provided by the careful placing of the pocket bag lining and stability is provided by a second length of elastic anchored to the front and back waistbands. The picture below shows the overall construction.

The steps for creating the waistband are below. It seems complicated at first and I’d recommend doing a trial run before committing your lovely fabric to this hack. It will give you the chance to try the technique and make any changes to the measurement although I also recommend not getting too hung up on them – just allow yourself a little extra fabric in all the waistband pieces and for the elastic and you can adapt the length as you go. You will need to be more precise with the loop in the pocket bag lining, but we’ll get to that.
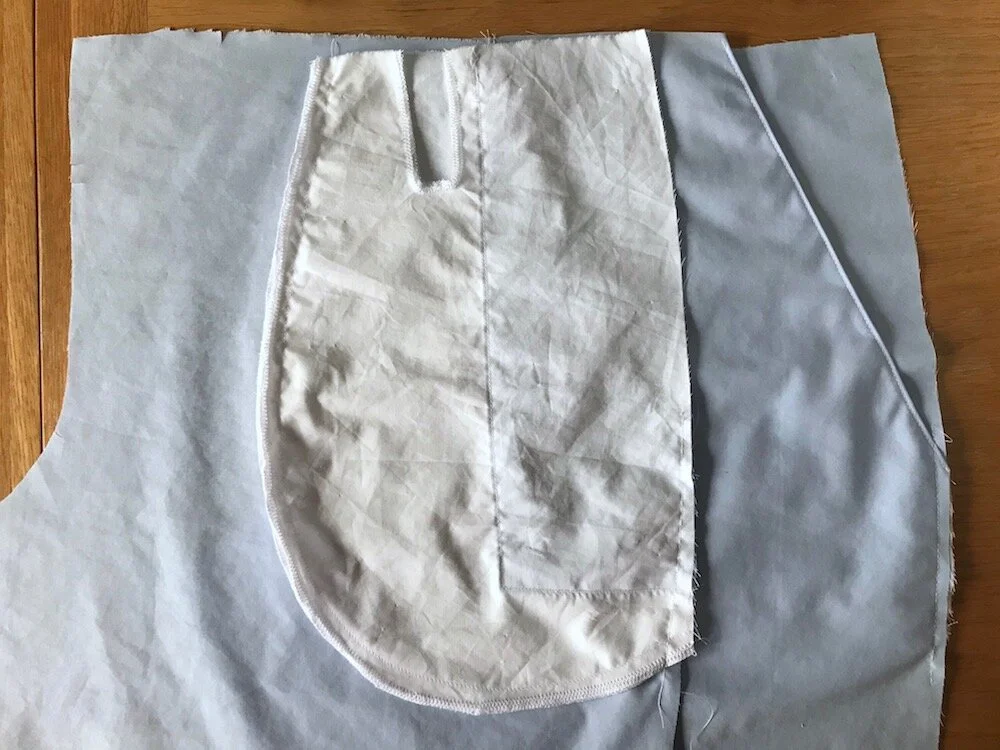
To make the construction clearer, I've used different coloured fabric for the trousers, the pocket linings, and the three waistband pieces. As I'm using scrap fabric and this pair won't actually be worn, some of the steps won't be shown in the photos but the written instructions are included.

What you’ll need
Original front trouser and waistband pattern pieces
Fabric and interfacing
Elastic – I recommend 25mm width
Ruler for adapting pattern
Pens and paper to trace the pattern pieces
Normal sewing equipment: scissors, thread, pins, seam ripper, sewing machine, chalk
How to create the waistband
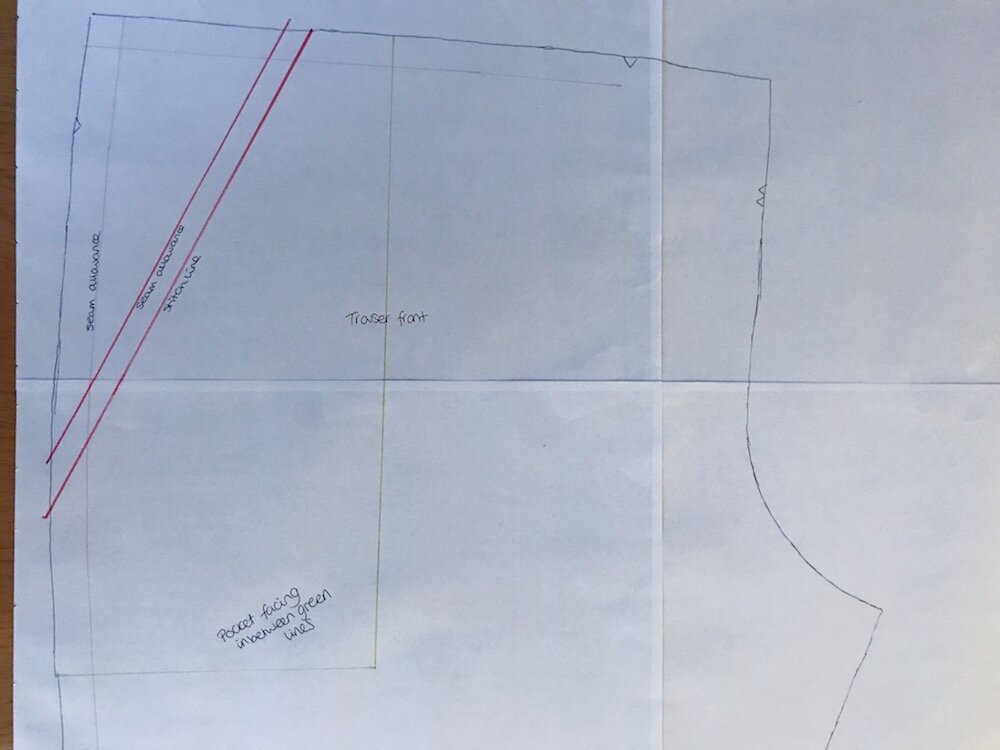
If your pattern doesn't have front slanted pockets, you will need to adapt your pattern. Take your trouser front pattern piece and mark the seam allowance on the outside edge and at the top. Draw a diagonal line from the top of the piece to the side seam. It's up to you how deep you want the slant to be - just make sure you leave enough room for your hand to go in. Add seam allowance - I'd suggest using 1cm to avoid bulk but go with whatever you feel comfortable with.
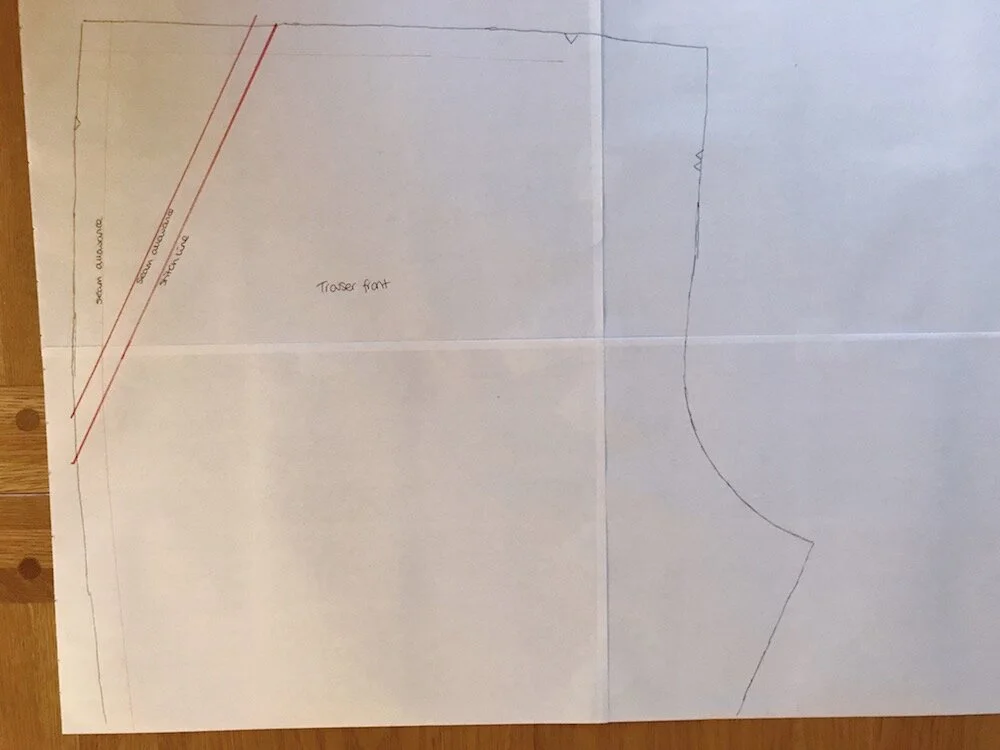
To create the pocket facing, trace off the top corner of the trouser piece, extending past the bottom of the slanted pocket on the side seam, and the top at the waistline to create a rectangle. Be generous here as you will need to have enough to fold under the raw edge. You can always reduce the size of the rectangle later.
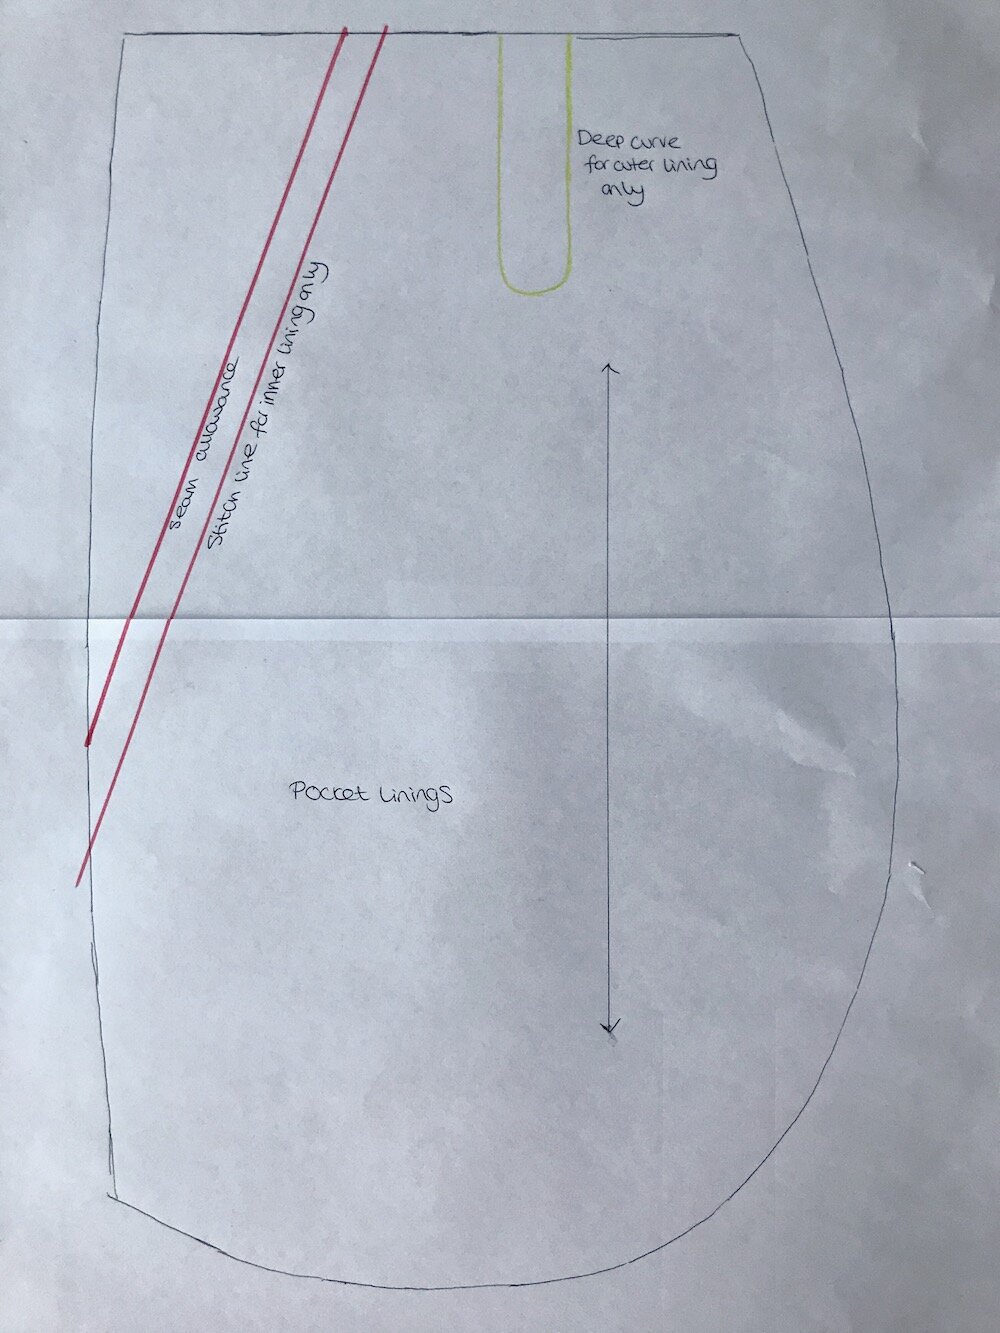
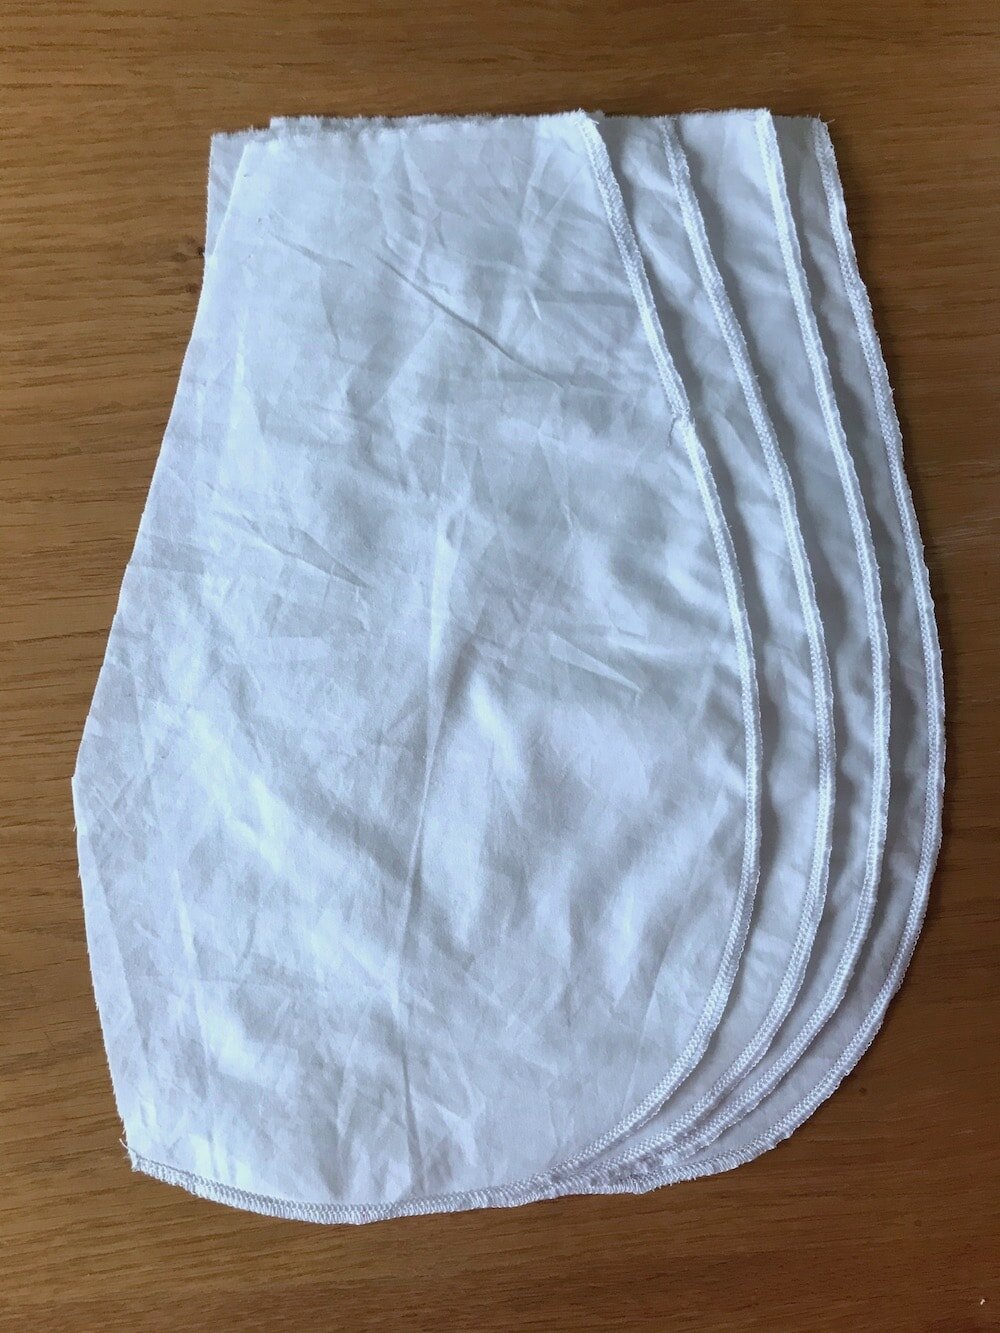
Next, you will need to adapt the pocket lining to create two individual pattern pieces. The inner pocket lining will be attached to the trouser front so you'll need to adapt the piece to match the pocket slant. Ensure that lining reaches up to the waistline. For the outer pocket lining keep the original pattern piece, ensuring it extends from the side seam and reaches up to the waistline. Starting about 2-4cm from the curved edge depending on the width of your pocket, draw a deep curve about 2.5cm wide and 4cm in length. Don't add seam allowance.
Turning to the waistband, you need to adapt the waistband pattern to create two pieces. My pattern uses a waistband that folds over rather than two pieces stitched together at the top. The back waistband needs to extend from the centre back, past the side seam, finishing level with the slanted pocket. Give yourself an extra couple of centimetres at the front as an insurance policy for when you stitch the waistband.
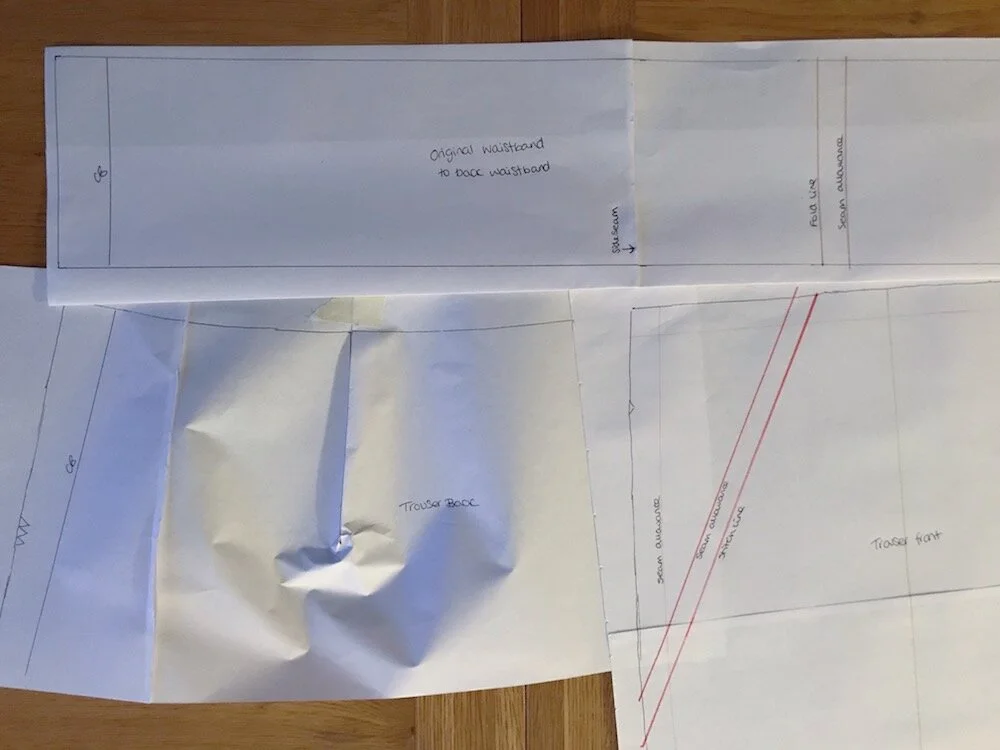
The front waistband will extend from the front past the side seam for about 3-5 cm. Mark the waistband about 1cm from the top of the slanted pocket and draw a diagonal line from that point to the end of the piece, reducing the height of the piece to about 5.5cm - be sure to keep you seam allowance.

For the third piece, draw a rectangle about 6cm high by 11cm long.

Cut out your pattern.
Interface the front and back waistband pieces. Add a thin strip to the slanted pocket on your outer fabric to provide a little stability and help prevent stretching. As I'm using fabric scraps, you won't see interfacing in the pictures but make sure you don't skip this step.
Finish the curved seams of your pocket lining.
Finish the deep curve in the outer pocket. You can either overlock this, lowering the blade so you don't accidentally slice through the lining, or add a strip of narrow bias tape. If you use the tape and accidentally stretch the curve, try using steam from your iron to help it shrink back into place
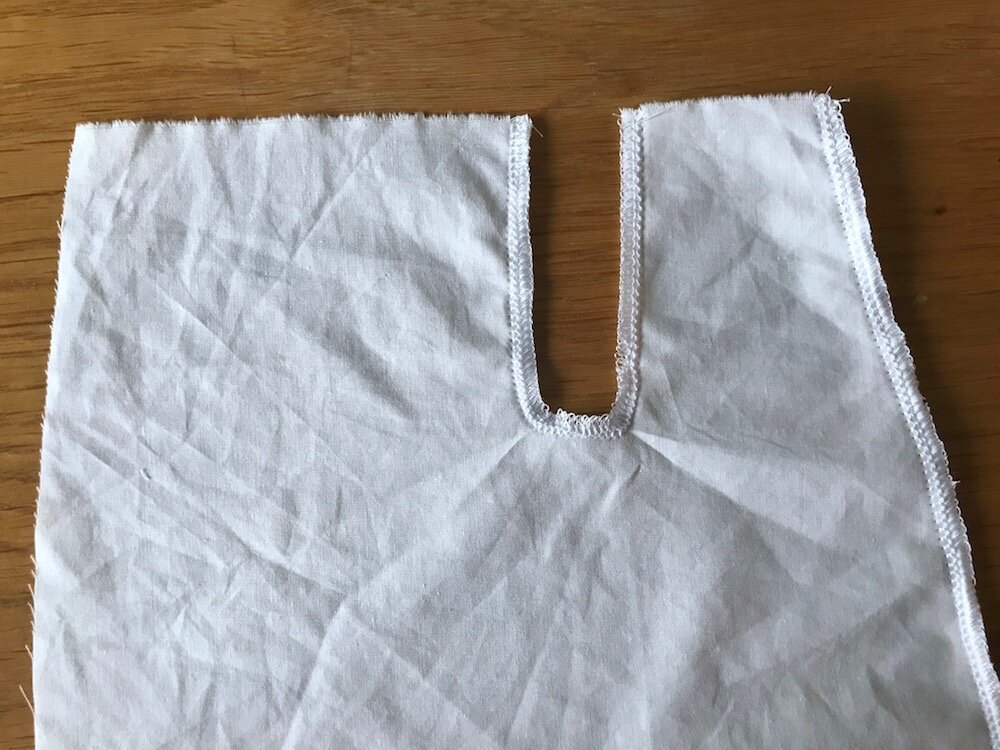

I used narrow bias binding for the pocket lining in the suit
Stitch the inner pocket lining to the trouser front. Press the pocket it under. To keep it looking neat, either top stitch, edge stitch, or under stitch.

Place the pocket facing, right side up, onto the right side of the outer pocket lining. Fold under the long edge so it finishes about 1cm ahead of the deep curve. Remove from the pocket lining, fold up the bottom raw edge and press both sides. Place the facing onto the pocket lining and stitch into place.


Stitch the pocket linings together along the curved edge. Baste the pocket facing to the trouser front at the side seam. Keep the top free.
Follow your pattern to stitch the trousers, including adding the fly, to the point where you need to add the waistband.

To make the waistband, begin with the back pieces. Stitch them right sides together at the centre back, following the stitching line indicated on your pattern. Press the seam allowance open. Press the waistband in half, wrong sides together. Then press in the other raw edge - the one that will become the opening at the pocket, and press up the seam allowance of the inner side.

Stitch the back waistband to the top of the trousers, stopping at the edge of the pocket facing - the tiny length of pocket lining should be kept free. Turn under more fabric if you need to at the pocket facing. Press the waistband up from the trouser.


For the rest of the steps, you can either complete one side and then the other, or repeat each step for both sides before moving on.
Scoop up your front waistband pieces. Press them in half with wrong sides together, press under the raw edge at the narrow end, and press up the seam allowance on the inner side.
Line up the front waistband with the trousers - ensuring that the pocket lining is incorporated as follows: the full length on the inner pocket lining and the narrow part of the outer pocket bag. This is very important to allow the waistband and pockets to move later. See the picture for reference if you're unsure. Stitch into place and press seam allowance away from trousers. Press up the remaining seam allowance.

Stitch the short length of front of the waistband.

Smooth out the waistbands and line up the slant pocket with the edge of the pocket facing. Pin in place.

Cut a length of elastic from the narrow edge of the front waistband to past the back dart plus a few centimetres.

Sandwich the elastic into the narrow end of the front waistband and pin in place. Edge stitch the open ends of the waistband from the pocket to the elastic. Add a couple of rows of stitching to secure the elastic - don't worry about being too neat as no one will see this part.

Take the loose end of the elastic and pin it to the inner side of back waistband level with the dart. You'll need to twist it before pinning in place to ensure that it lays flat when the full waistband is turned to the inside. Secure with a couple of rows of stitching and trim any excess elastic.

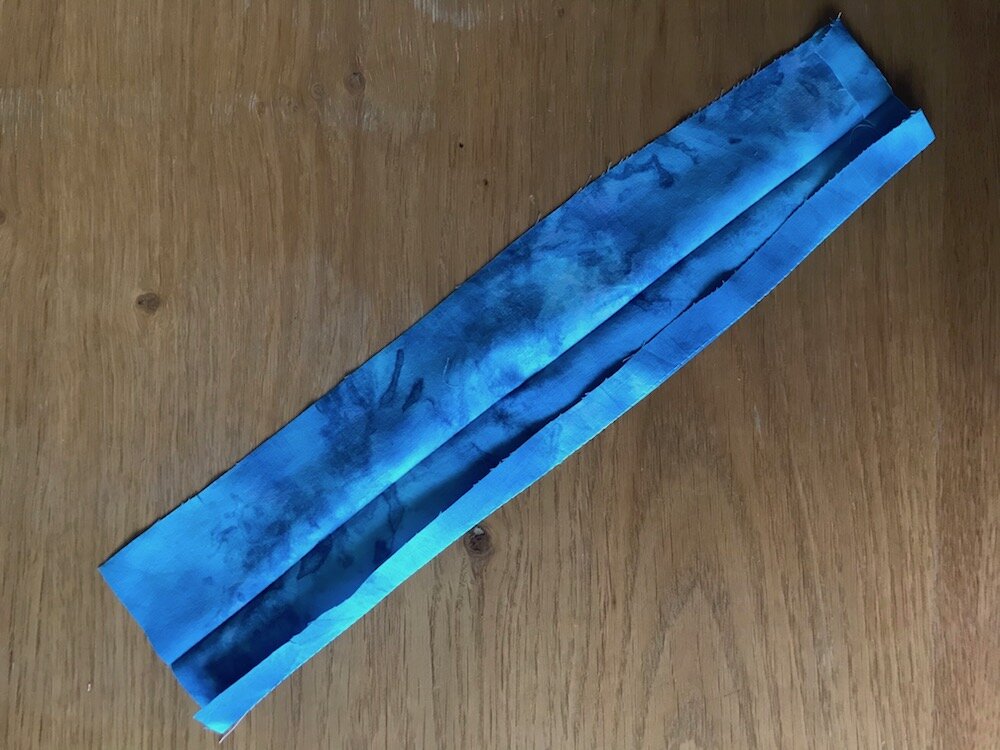
Next create the third part of the waistband. Press up the seam allowances on all sides and press the piece in half, wrong sides together.

Sandwich the second length of elastic between the fabric and secure at one end. Edge stitch the bottom being sure not to catch the elastic.

Position the covered end of the elastic to the back waistband on the inside, about 2cm before the side seam. Lay the elastic flat and stitch the uncovered end to the inside of the front waistband at the edge of the pocket lining - again you'll need to twist it to ensure it lays flat. Stitch both ends into place being sure not to catch the other side of the waistbands.

Fold over the waistbands, ensuring nothing is twisted, and pin in place. Make sure that the front waistband is completely clear of the back waistband. Slip stitch the inner waistbands into place.

Remove any remaining basting stitches and pins. You’re now done and should have something that looks similar to this.


Enjoy the additional comfort!