The Toronto Ginger Skirt
Last August, Adam and I spent an afternoon shopping in Toronto as our honeymoon drew to a close. Obviously I chose the local fabric stores over the mainstream chains in the hope of bringing home a couple of souvenir pieces. We visited Affordable Textiles on Queen St W. It didn't disappoint with fabric stacked from floor to ceiling. While I went hunting for viscose, Adam paused at the front of the shop and called me back to look at an interesting pattern full of deep, slightly muted colours which would make a cool statement skirt. Without deliberating, I purchased two metres and popped it into my suitcase. I then spent six months dreaming of the finished skirt frequently worrying it wouldn't live up to the image in my head. While it hasn't quite come out as planned, it hasn't disappointed and I bloody love it.

A print like this is demanding. It needs to be disturbed as little as possible with careful thought on pattern placement. To make the most of the print's size, I chose the classic A-line skirt and went back to an old trusted pattern, Colette's Ginger Skirt. This pattern fits me like a glove due to it's distinguishing feature of providing shaping through a gently curved centre front seam rather than darts. However, I couldn't bring myself to slice up the centre of the print and made my only pattern modification by cutting the front on the fold. This change seems to have made very little difference to overall fit as it still manages to hug my lower stomach smoothly and comfortably.

I knew pattern matching would be required and chose to focus on ensuring the front and back matched, leaving the side seams to fend for themselves while hoping the busy print would camouflage the seams. Despite taking a long time considering pattern placement and slicing the waistband into more pieces than required to keep a continuous pattern, I was only partially successful in getting everything to line up. The pattern flows best at the front where the waistband meets the skirt and I don't think the centre front seam is noticeable. Basting the centre back revealed two options: a very obvious failed attempt at matching or mirroring the print by reducing the seam allowance a little. I chose the latter on the basis that it didn't irritate me as much. While I didn't think about the side seams, the pattern is only a few centimetres off and looks much better than it could have.

When choosing the fabric in Toronto, I couldn't fully identify it. Its weight suggested a medium weight cotton but it was very stiff and had a sheen to it with an unusual texture suggesting it had a coating of some kind. I was advised that it was a home furnishing cotton which had been treated to make it flame resistant. It was possible to wash it but that would dramatically reduce the effectiveness of the treatment. I had no idea how the print would look after washing but it seemed a risk worth taking. The cotton softened a lot but kept some of the sheen and the texture. I suspect that it will continue to soften with wear but the print seems very stable and unlikely to be affected by further washing.
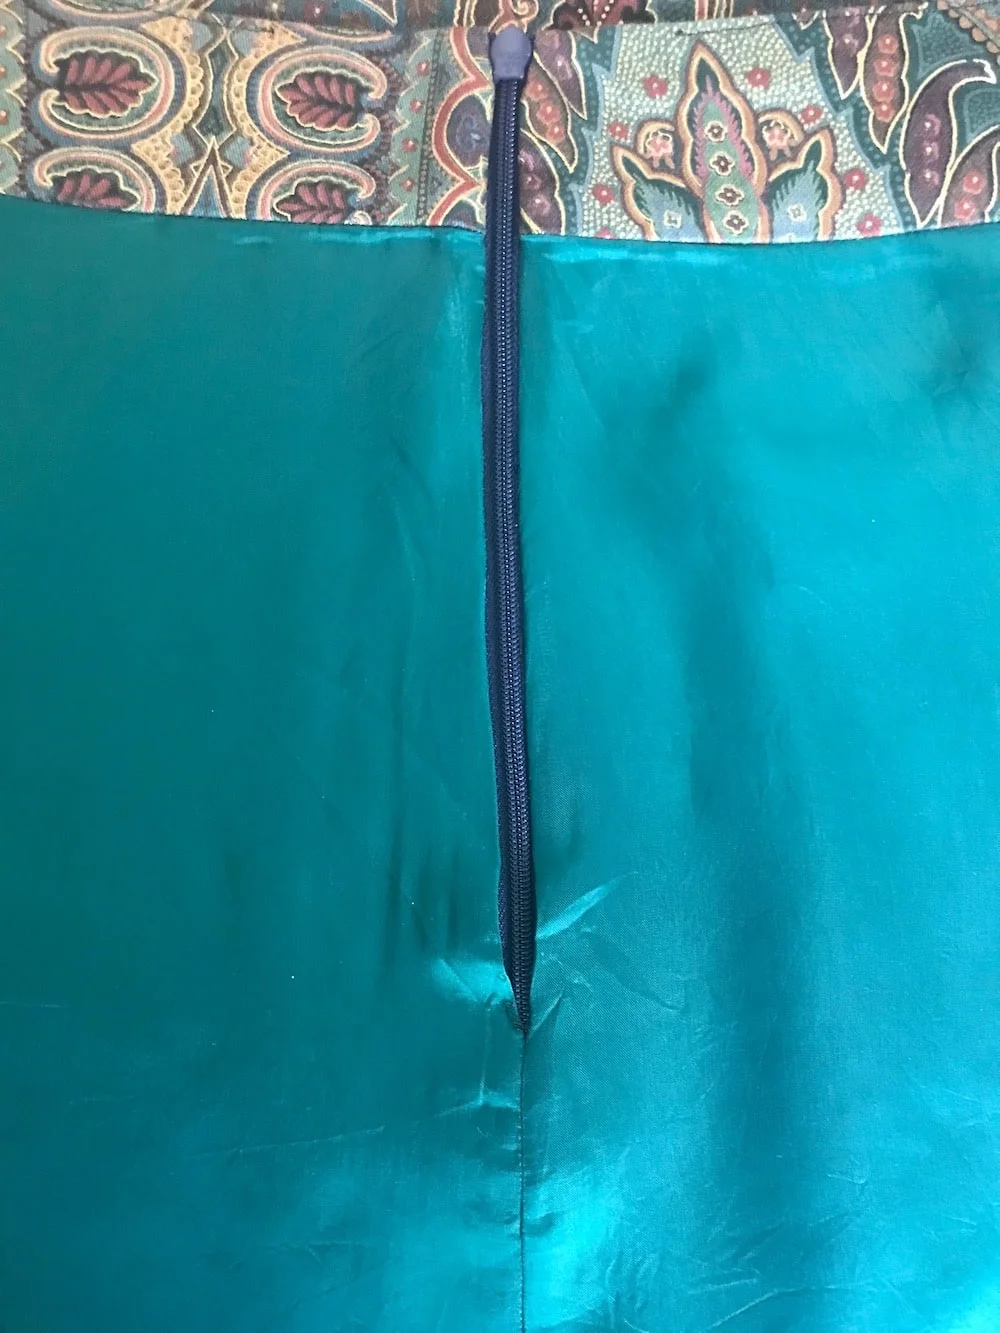
I have no idea if it is related to the treatment or if its just the weave, but the back of the cotton is rougher than normal and doesn't feel good against the skin. To wear this skirt frequently, a lining was definitely needed. I paired the cotton with a gorgeous deep jade bemberg from my stash which is impossible to photograph correctly. The lining is attached only at the waistband. To get a professional finish on the inside, I inserted the invisible zip using my tried and trusted technique that removes any hand stitching. I enjoyed the moment when the zip went in perfectly on the cotton at the first attempt with seams and print lining up beautifully - something that rarely happens. I heavily clipped the inside to allow the waistband corners to look as sharp as possible, helped substantially by the under stitching along the waistband. To create a flawless hem, I diverted from my original plan and hand stitched it into place. I had wanted to machine stitch it but didn't have a thread would blend into the print well enough - the black under stitching on the inside waistband is quite noticeable. The hem is overlocked, turned up by a centimetre and secured into place with catch stitch.

I adore this skirt. While muted, the colours and print are brightening up the dull grey days we are still experiencing. The style fits perfectly with my preferred winter silhouette of a skirt and top with tights and boots. It's very well made when I compare it to my other earlier Ginger skirts and should stand the test of time. I get a little confidence boost everything I look at the skirt and wear it. I don't think you can ask for more in a make.