Fly Agaric Mushroom Embroidery

Over the past three weeks I have finished two new embroideries using long and short stitch, otherwise known as silk shading, needle painting, or thread painting. As someone who always has a project on the go, finishing two in such a short span is very good going. The secret? Being laid up on a sofa recovering from a laparoscopy knowing you can't do the vast majority of your normal activities. I knew that not having a creative project on the go wasn't an option - I'm one of those people who struggles to sit and watch TV without something to occupy their hands. Three weeks of nothing seemed daunting. So in between naps, I needed something small, light in weight, and could be completed while I was laying on the sofa propped up by multiple cushions. Embroidery seemed the obvious answer and I bought a seat hoop stand to ensure I wasn't putting unnecessary pressure on my abdomen. Complete game changer.
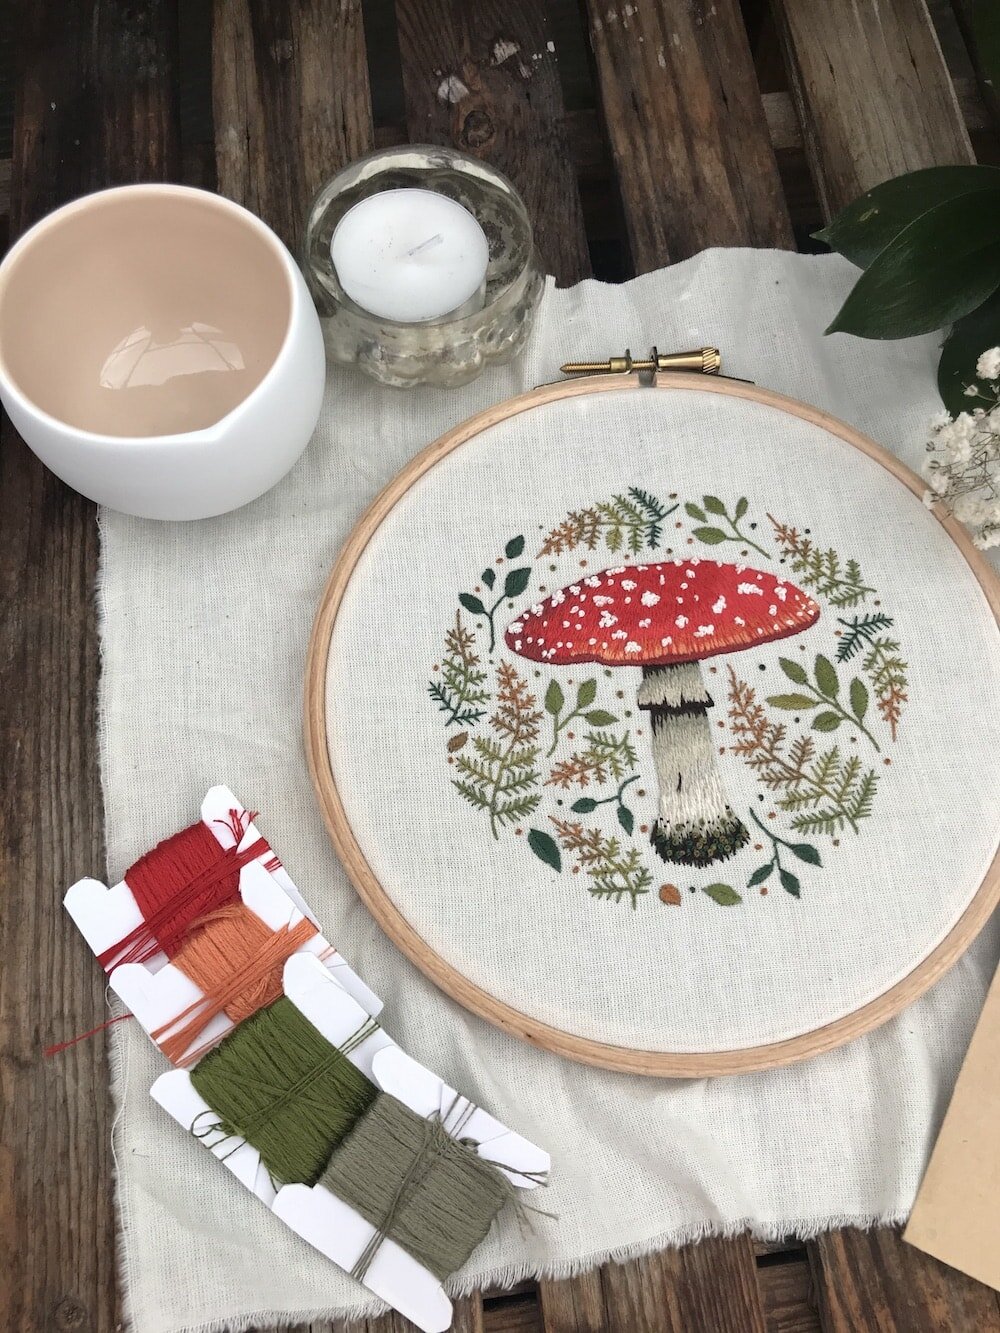
This completed Fly Agaric Mushroom is my third pattern by Emillie Ferris and has been over a year in the making. I prepared the hoop in summer 2019 but then "lost" it somewhere in the creative mess of the study. I found it with a partially completed stem and half a fern leaf completed. I suspect that I wasn't happy with how the stem was working out and switched to the foliage. Before continuing with the pattern this month, I decided to rip out all the stitches in the stem - they were a little wonky and the blending certainly wasn't working.

Determined to bring my new found learning from the online Royal School of Needlework class I took just before picking up this hoop (all the details coming in a post soon) I chose to start with the mushroom and finish with the foliage. In silk shading, you complete the section that is furthest away first. In this case, it is the stem as Emillie directs you in the pattern instructions. I found this section particularly challenging. I found it difficult to know when to introduce new colours and therefore struggled to get a smooth colour blend. This was most apparent at the bottom when I introduced the cream and had to go back and add a lot more to get anything like a smooth finish. As a result the bottom on the stem is a little heavier than I would have liked. Some strategic flecks of dirt and French knot moss has helped and doesn't draw the eye so much.

In contrast, the cap was a joy to stitch. This is partly due to the vibrant reds and oranges but also because I felt more at home with the blending and wasn't scared to have multiple colours on the go at once. The bottom of the cap is full of tiny details. The lighter part represents where the sun shines on the mushroom and is created by a couple of narrow lines of orange with the odd red stitch added. The stitches are very tiny here and took a lot of concentration but it was worth it. I have no idea how many French knots I added. I took a general steer from the finished item in the pattern but decided not to be too picky on where they landed. French knots are one of my favourite stitches for adding texture to a piece and they are very quick to create once you've got the hang of keeping the thread tension even.

The foliage took a lot longer to complete than I originally anticipated. The fern leaves are made up of tiny split stitch across a range of colours to give it that autumnal feel. When I have previously used split stitch it has been to outline an area that will then be covered by long and short stitch. As a result, I've never really been bothered about achieving a consistency. That had to change for the foliage and getting them to look reasonably even took a lot longer. The stems of the leaves are also created in split stitch with Fishbone stitch used for the leaves. I had never tried Fishbone stitch before. While it takes a little time to cover a small area with a single strand, the effect it creates was very satisfying. To save having multiple needles on the go, I worked this part systematically across the full piece one colour at a time. As suggested, I added a range of French knots amongst the foliage which very quickly drew the full piece together and is a lovely finishing touch.

Like my other two patterns (Pansies and Butterfly), I purchased the PDF pattern and sourced all the materials from my stash or online. I believe Emillie is now offering kits which come with everything you need to get going. This pattern calls for a 5" hoop and 16 DMC colours. The pattern provides photos of two finished versions - one on white background and another on black. Having now seen how the vibrant reds of the cap work together, I kind of wish I had made this on a dark background as they would really pop. Having said that, I'm very pleased with how this turned out and it will shortly be added to the wall with the others.