Wedding Dress - Skirt and finishing touches
This is the last construction post of my wedding dress! I'll cover creating the skirt, adding the bodice and the finishing touches.
You may remember in the photos of the dress toile the skirt was narrow and the train rather short. I was keen to fix this in the actual dress as it felt limiting (both in style and movement) and I wanted to show off the beautiful fabrics as far as possible. With a limited amount of fabric, the width of the skirt and therefore the length of the train was determined by the width of the silk satin.

At 132cm wide, the early indications were that this would be close to what I had originally wanted. At the cutting out session, we took the skirt pattern and sliced it up the middle, laid it on the silk satin and spread it as far as we could. By this time I had my shoes and they demanded an extra 8cm of length to be added at the bottom. We smoothed out the curved hem before cutting out allowing extra wide seam allowances. These would give us greater flexibility in ensuring the silk satin and lace skirts lined up neatly when they were fixed together.
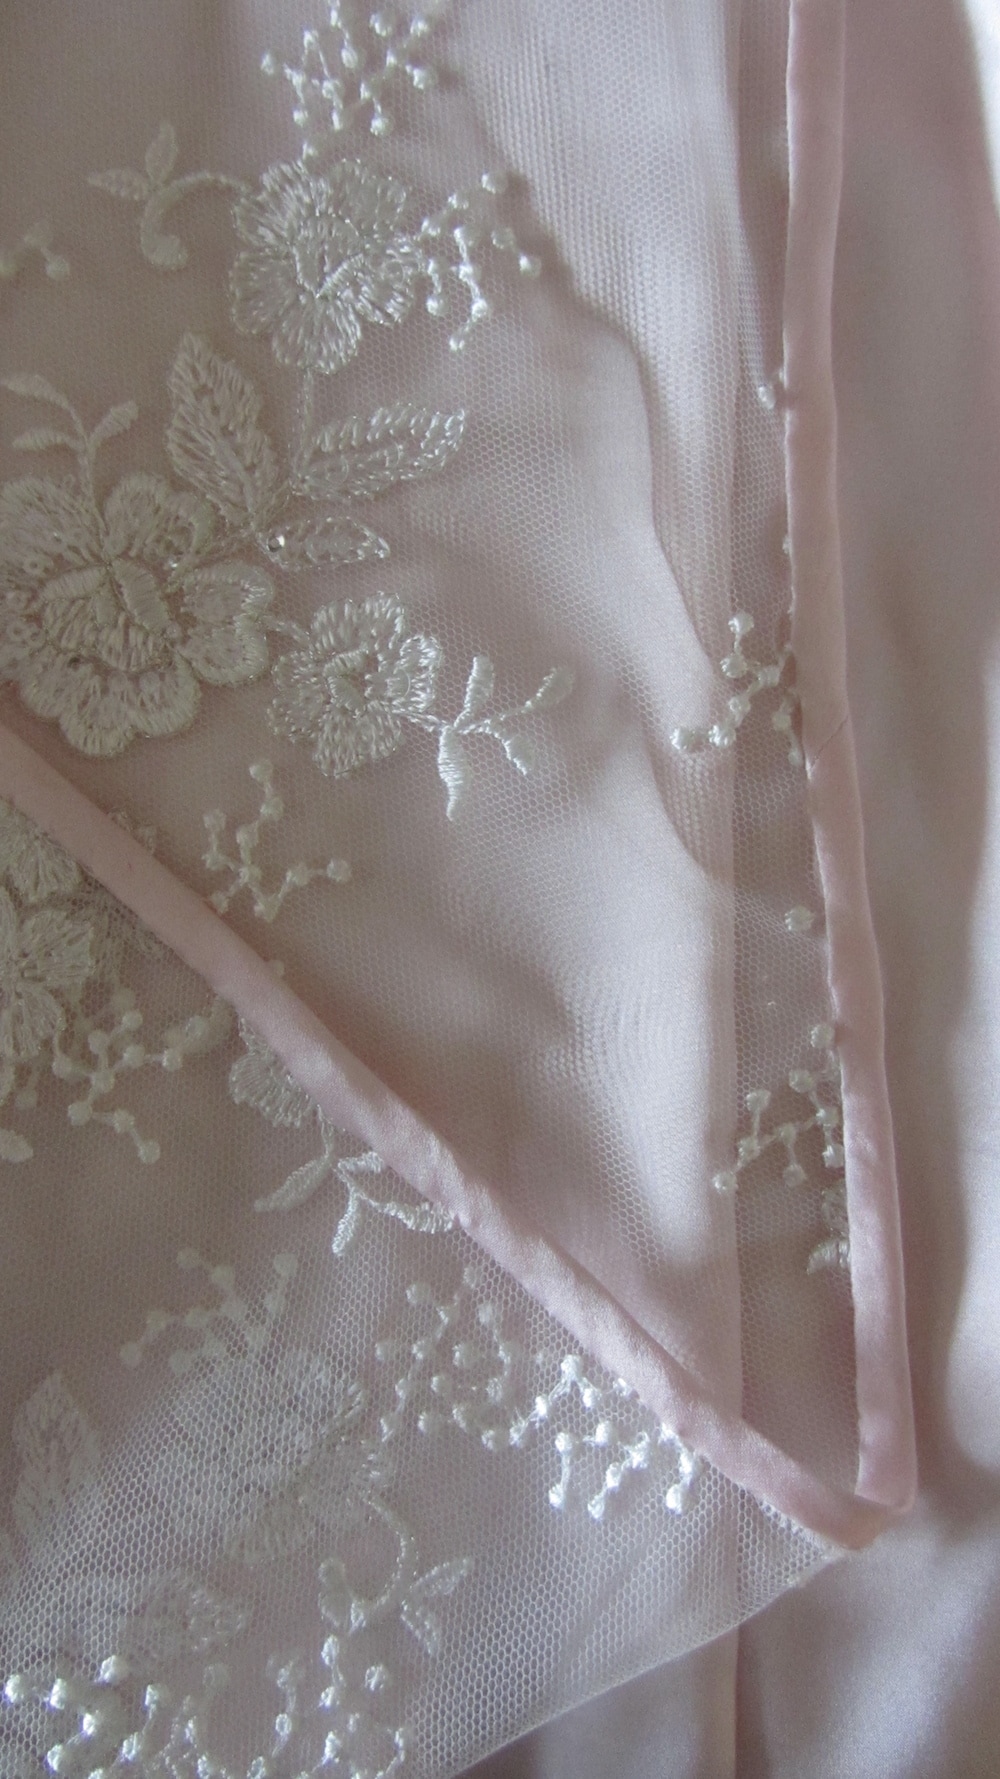
Cutting out the lace skirt was a little emotional. I wanted the beautiful scalloped edges to skim the floor at the front and be complete all the way round the skirt and ideally for the train to finish in a smooth curve. The lace had other ideas - to achieve the smooth curve I would need to clip the lace and add a large part by hand. This was based on the assumption that we would cut the lace length ways and piece the skirt together using applique seams. Seeing it all laid out and imagining how it would look made me realise that it didn't feel right.

While I was cutting out the silk, Chris was laying out the pattern pieces on the lace and experimenting. By placing the pattern on the cross grain it was possible to cut the entire skirt in one very large piece. No side seams, no applique needed! We wrapped the lace around me to check the drape would work and I got very, very excited. Cutting this way would allow the lace to shine as it was intended. There was a compromise though - to keep the full scalloped edge it would have to end in a gentle point rather than a smooth curve. After seeing the drape of the lace, I decided that maintaining that was more important and chose to adapt the train. As an added bonus, it halved my workload!


As with the bodice, the silk satin was mounted onto silk organza. When testing the fit, we took out quite a bit of excess at my hips (a standard issue for me) to ensure that we got the gradual A line. I finished the seams in both the silk satin and the lining with French seams. Alterations were needed to the lace skirt as well - we had to raise it at the waist by about 8cm and ease it into the waistline while ensuring that the lace matched up along the centre back. The back of the lace skirt was left open. Now came the most complicated part - adding the skirts to the silk satin bodice.

I completed the lining first, attaching the skirt at the waistline to the lining of the bodice. I then inserted the invisible zip to the lining and the foundation carefully keeping the silk satin out of the way. Thankfully the zip went in perfectly first time. Following this, the silk satin and lace skirts were basted to the silk satin of the bodice and stitched into place. The centre back seam allowance of the silk bodice and skirt were pressed under and slip stitched along the zip. Keeping the silk from bubbling at the bottom of the zip was the trickiest part and the thread was ripped out a number of times.

The lace overlay was added next - hand stitched into place at the side seams and anchored loosely at key points along the waist line. All of a sudden, the dress had come together with only the centre back closing to add. It felt like I was on the home straight although there was still a lot of work to complete and time was slipping away.

Completing the centre back required long strips of silk satin cut on the bias - somewhere between 7-8m. To minimise the number of joins, I cut the stripes as long as possible - about 70cm - before they became too distorted. I needed two strips at 3m for each of the centre back seams and enough to create about 130 rouleau loops. Despite sounding a lot, the loops were relatively quick to make as the silk turned out on itself easily and were cut to the exact length needed.
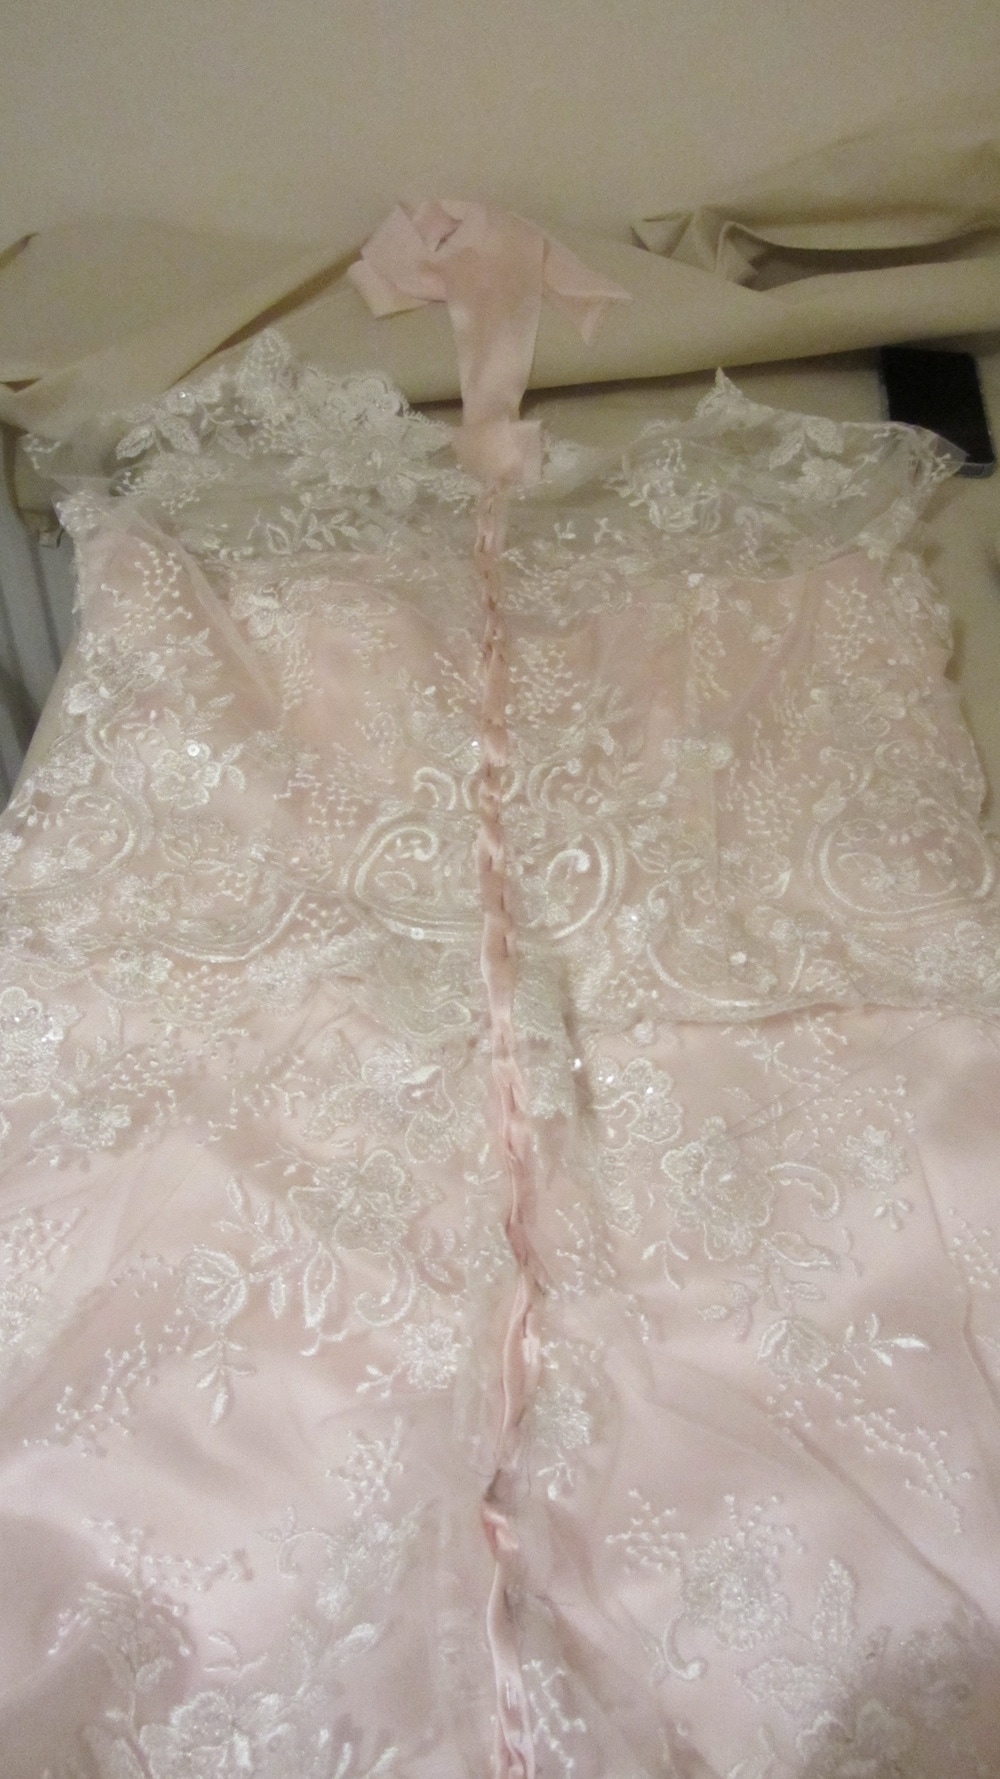
To ensure everything lined up, I basted the bias strips onto each of the lace centre back seams. A quick fit revealed that I needed to let out the middle of the lace bodice as it was pulling too tight across my shoulder blades. I finished the left seam first as it was the simplest - the bias strip was stitched into place with the machine and the pressed towards the centre of the dress. The raw edge was folded under before being slip stitched into place. To keep the top and bottom openings clean, the extra silk was folded up/down and before being anchored by the slip stitching.
The right side was more intensive as the loops needed to be included. The bias strip was machine stitched into place and pressed towards the centre of the dress. On the wrong side I matched up the loops to the edge of the seam allowance. The loops were added with the following pattern: 1cm between the ends of a single loop, a 0.5cm gap and repeat for the whole length of the dress - 126 loops in total.

Each loop was pinned and then basted tightly into place. The raw edge of the binding was folded over and covered the raw edges of the loops and hand stitched into place. To secure the loops, they were hand pressed towards the opening and secured into place with a few tiny hand stitches per loop. Even though I broke up the hand stitching into small chunks and took frequent breaks I developed severe cramps in both my hands. Once recovered slightly, I began the process of stitching the buttons on to the left hand binding. The buttons are covered in the same silk satin and were created by Harlequin based in Essex. They were super quick, returning the buttons a few days after I sent off for them.


Adding the binding, loops and buttons took three days in total - the only part of the dress I can actually put a time frame on! While the dress features 126 fully functioning buttons, only the top 50 were used to put the dress on.

To fully finish the bodice, I added a rouleau loop and button to the top to help with the strain on the invisible zip. Finally, I was at the hemming stage and went to see Chris for the final time. She kindly measured the hem while I stood in my shoes. The silk satin skirt is hand stitched to the organza using the slip stitch.

It is 1cm in depth, double folded and I rolled it back to ensure the hand stitching is completely invisible. The hem was very lightly pressed to remove any remaining pin and basting marks while maintaining the smooth curve of the fold. I did this over a couple of evenings as my hands still hadn't fully recovered from the loops and buttons. The lining was finished in the same way but went through the sewing machine and was fully pressed. A quick review of the dress to ensure all the basting thread had been removed and it was finally finished - five weeks ahead of the wedding.
Stay tuned for Saturday's post for photos from the big day!